Wednesday, October 26, 2011

Photo Quilts on Display at PIQF

So sorry for the lack of posts, I've been a little blue lately. I'm not looking forward to cold, gloomy weather... I don't think the dogs are, either -- Yoda definitely did NOT want to walk far yesterday when it was 15F out! (not that I blame him...)

I'm part of a small photography/quilting group called "Pacific Photos 2 Fiber" and we had a special exhibit at the Pacific International Quilt Festival (PIQF) in Santa Clara, CA a couple of weeks ago. We each had a couple of pieces in the show, all featuring photos or digital images in some way. There was a nice variety of subject matter and quilting styles. I will try to post pictures soon.

Our quilts must have made an impression on at least one person, since we were featured in her blog. Whether it was a good impression or not, I'll leave up to you! It was a good learning experience to see what someone else had to say, but definitely humbling! (my quilt is the last one she critiqued). I feel bad that my write-up wasn't more helpful so I looked at the fabric again and I can see the words (they're faint and not quite readable, but that was the intent), and she's absolutely right about the fish... Oh, well, live and learn, right?

Hope you're well and enjoying your creative time. Ta Ta for now!

Wednesday, September 14, 2011

A Ring of Bling!

Hello, All! Thought you might like to see the glitzy beaded beads I've been working on. They are both the same size even if the scans don't look like it (about the size of a quarter, if that helps). The pattern is "Sparkly Wheels" from Beadwork presents Beaded Beads. Both use 4mm Swarovski crystals, the top one uses Delicas and the bottom one uses size 15 seed beads. I like the slightly daintier look of the seed beads, but had a hard time getting through some of beads with multiple thread passes. I'm donating the black and gold version to a raffle for our agility club and keeping the green one.

Sunday, August 7, 2011

My Challenge Quilts

Our two local quilt shows are over for the year -- phew! (Sisters Outdoor Quilt Show and our guild show). A break would be nice, but I've got to finish samples for the fall term at The Stitchin' Post. Oh, well, it is nice that someone might pay me to teach the fun things I like to do so I'm not really complaining.

Every year I pose a challenge to our quilt guild, and this year's was to interpret the theme "Heart's Delight" (or "Hearts Delight"). I'm not an ooey-gooey quilter so I went for the first meaning and made three little quilts (approx. 20" x 20"). They were designed to stand alone (class samples!!!) but they were related enough in color that they could work together as well. To meet the size minimum, I stitched them together for the show. For my artist's statement, I called the grouping "Follow Your Bliss" because I combined my passions for making fiber art and running my dogs in the sport of agility. I call the small pieces Art, Work and Play:


Tuesday, July 26, 2011

Color of The Day -- Blue-Green!

I am back in town for a while and have been sewing and painting like crazy. Finished this fabric recently -- isn't it cool? I've got some backgrounds painted and ready for the next layer of stencils and stamps.

I should have my Laundry Blues top ready for quilting this evening -- yea!

Wednesday, June 1, 2011

In Case You Missed It... My Quilt Gallery Show

My quilt exhibit comes down tomorrow, but here is a link to the QuiltWorks blog so you can see some of my treasures! (Ugh, and me, too...) (May 2011)

Tuesday, May 31, 2011

Ruby Red Tootsies!

Well, ladies, I finally splurged and got a pedicure! My hairdresser opened her own salon and has an aesthetician coming in once a week, and she wanted to fill Melissa's first day with clients. What the heck, it was fun. I asked my friend Bevalee what color to get, so ruby red it is!

Creating on the Road?

Hello!

We spent part of Memorial Day weekend over in Salem for an agility trial -- our first time doing one specifically for small dogs. The courses are more compact and the equipment is smaller (and so cute!) so I had high hopes. Wookie did well on his run -- he had a clean run and got his first "Q" (qualifying leg to move up to the next level). He only does a few of the obstacles so he's limited in which events he does. Yoda and I ran in a fun match to become familiar with the equipment on Friday night, and a train ran right behind the building during his first run. We might as well have gone home after that because he got so scared that he just shut down on Saturday. It was so disappointing because he would have loved the games.

Enough of all that! We'll be taking a long trip in the motorhome later this summer and I'm already getting a little itchy about being away from my workbench and sewing machine for that long. I will take a box of beading projects but I'm not sure if I can get anything done in a small space with a puppy! I'm sure we will stop at a quilt shop or two, but I'd like to know how other artistic people handle being creative when they travel. If you have any secrets, please let me know!

Tuesday, May 24, 2011

More Bling!

This little bracelet has been on my "to-do" list a while (design was published July/July 2005!) and I finally got it done. It was supposed to be an instant gratification project, but I messed it up the first time. I pulled it apart and remade it, but it sat for two days waiting for the loop closure because I was bummed it was too large. Never fear! I added the loop two units from the end instead. :-) It is made with 4mm Swarovski crystals and size 15 seed beads -- a bit small to work on at night but I like the proportions. The double-needle right angle weave was a challenge for a tired brain to fathom at first, but once the pattern is set it is fairly easy to stitch away. Isn't the beaded toggle cute?

Wednesday, May 18, 2011

Spring Bracelet


It has been cold and dreary here, so last night I decided to whip up a bracelet to brighten things up. The flowers and leaves are Lucite -- I picked out pieces from a couple of samplers from The Hole Bead Shoppe. Swarovski crystals, of course! I bought some 8mm crystal AB rondelles ages ago and then didn't use them because they seemed too glitzy. They're perfect for this, don't you think? How fun, it goes with almost everything (and the sun is peeping out at the moment -- hooray!) I do love instant gratification... :-)

Tuesday, May 17, 2011

Mixed-Media Mini-Quilt

I managed to get this class sample done yesterday -- a little late but done is good! A couple of my recent mixed-media classes have been canceled for insufficient enrollment (I needed 4 students and only got 3...). I'm starting to think that people are more comfortable doing a specific project that spending the time playing with new media and techniques, so this is a follow-the-recipe project.

The motif at the top is printed on photo fabric and features a digitally altered library card from Designer Digitals. The lace is recycled from an old garment and "dyed" with diluted fabric paint. The paper heart is stamped, painted (including splatter painting, one of my favorite techniques ever!), and embellished with "dyed" cheesecloth. I used my Sizzix die cutter to cut out the heart and was pleased with how easily and cleanly it worked. The cut-out in the center of the heart is backed with a second layer of stamped paper (scrapbook paper glued to 60-lb stock for stability -- otherwise it was too hard to keep the backing layer smooth and flat). I stitched the heart to the quilt by machine with variegated thread and a zigzag stitch. The quilt layers are fused to batting with Wonder-Under and the edges are zigzagged. I think I'll make a second sample with a vintage hankie instead of lace.

I hope your day is filled with creative fun!

Our New Little Girl!

Hello, All! One look at this picture and you can guess where my attention has been the last few days. :-) Say hello to Jade, our 17-week-old Papillon puppy. Isn't she a cutie pie? That's my hubby, Chris, and ugh! me on the right. I'd rather be behind the camera...

I wasn't going to get a new dog any time soon since I still have so much to learn about dog training and agility handling, but an agility friend was thinking of getting a Papillon so I thought I'd check to see what was out there. What an evil friend I am -- I saw this little sweetie and decided she needed to be mine instead!

We're her second home, her first "mom" was diagnosed with breast cancer shortly after adopting "Bridget." She is a handful (what puppy isn't?) so her owner asked our breeder to re-home the puppy so she could concentrate on her treatment. Bridget had lots of fancy clothes; as Jade, she has two other dogs to play with and agility competition in her future. Chris adores Jade and loves having a sweet puppy to cuddle with, and I'm already starting to train her. She loves to play tug and says cheese and other training treats are yummy!

Saturday, April 30, 2011

Just Call Me Miss May!

Just a quick note that I'm getting ready to show my quilts in the Quiltworks gallery in May. This wonderful new shop in Bend has gallery space above the shop and they feature a different local quilter every month. Of course I will take more quilts than they can possibly show, but heaven forbid a small amount of space would go empty! I will post a link to the photo blog once it is up. Until then, I'm frantically sewing labels on the quilts I have neglected...

Thursday, April 28, 2011

Taking It On The Road


I finished the first of 3 mini quilts to go on my lighthouse quilt. It is 8" x 8" and will be sewn to the top of the larger quilt. Gotta get it done for my "gallery show" next week. HA! Doesn't that sound la-ti-dah? One of the local shops has a gallery upstairs and my quilts will be there in May. I wanted to have more done, but you know how that goes...

Just wondering how many of you keep a sketchbook/art journal. I've been resisting, but my friend Marlis is doing some fun things, and I'm starting to think I'm just being obstinate! Check out her latest post.

I'm off to the Corvallis area to do a trunk show for the Mary's River guild. It looks like I'll hit snow going over the pass :-( but should have enough time to hit a quilt shop or two on the way.

Tuesday, April 26, 2011

Agility Weekend!

Hello, All--

I was off last weekend at an agility meet with the boys and haven't had much time to sew. I thought you might like to see a video of one of our runs. We're both rookies and I definitely made some mistakes, but it was a fun run. We'll do better next time!

Friday, April 8, 2011

A Fun Project


Hello, Everyone--

I feel guilty that I have neglected you terribly! This little sandpiper is one of the reasons -- I started this in an online class with Jane LaFazio through Joggles.com and became obsessed with getting my little bird done. I am pleased as punch that the bird looks real!

This class (Mixed-Media with Paper & Fabric) has been an interesting learning experience. I like creating textures, but I don't like losing the tactile nature of fabric by gluing paper to it with an acrylic medium. That seems to be the way a lot of mixed-media artists work, but I guess my traditional quilting roots are showing! If I'm working on a stretched canvas I don't expect the finished product to feel like a quilt, but I expect a quilt to look soft and touchable (even if one isn't supposed to touch it).

I'm showing some of my work at a local shop next month and I'm trying frantically to finish some new work. I'll let all of you see it first!

Thursday, March 31, 2011

On The Road Again...

1000 apologies for not keeping up with everything while I was at Asilomar -- I couldn't update my blog with my phone and was too busy to haul my laptop down to the social hall to get the wifi. I'm heading home tomorrow and will post lots of pics this weekend.

Being Artist in Residence was a tremendous opportunity and I got a lot done in my 5 days. I completed a little quilt, moved ahead on my lighthouse quilt and came up some new things I want to try -- all in all, it was a crazy, productive, utterly satisfying experience.

My class with Gloria Loughman was tremendous as well, although I still have a lot of work left to do. I love her technique for colorwash backgrounds, so I spent my time cutting and auditioning fabrics for the background above. The 60-degree diamonds were cut 3" -- the rows are pieced but I still need to sew them together. That's a lot of intersections to pin... The piece will actually be flipped 180 degrees so "Sluggo" (an Indonesian nudibranch) will be moving up to the yummy yellows. He is large -- about 30" long and I may start him at our guild retreat in April.

I hit the road tomorrow for a 9.5 hr drive (hopefully no traffic!). Can't wait to see my critters and sweetie again. More this weekend...

Monday, March 21, 2011

Greetings from Asilomar!

Hello, Everyone! I arrived at Asilomar yesterday (in Pacific Grove, on the central California coast) and got set up for my session as "artist in residence" at Empty Spools Seminars. I gave my talk last night and now I get to play for the next 3 1/2 days. How fun is that, getting paid to sew and be creative? The photo above is of my workspace for the session -- I brought enough projects to work on to last a month but won't get it all done, of course. Right now I'm looking out the window at the ocean so it is a wonderful day in my neighborhood!!!

Wednesday, March 9, 2011

Painting with Wild Abandon

Hello, Everyone!

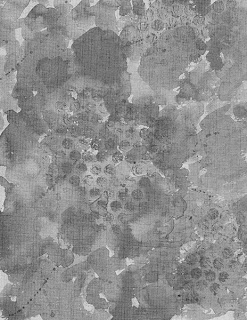
This "finding your artistic voice" stuff is a challenge! There are so many things I like to do and I haven't figured out how to combine them all yet, but I keep plugging away. That sounds like drudgery, when it is really fun creating physical textures with paint for Kim Klassen's "Art of Texture" class and Jane LaFazio's "Mixed-Media With Paper & Cloth". Kim's class is primarily about using textures in Photoshop, but what attracted me to the class was that she included info on painting your own textures. I followed Kim's directions for the texture above, in colors I'm using in Jane's class!

I don't usually work on paper, but it has been a lot of fun. Maybe I don't sweat errors as much because paper isn't $10+/yd! There are definitely advantages to working on paper -- the paints spread more smoothly, and they don't run the way they can on fabric. Either way, I'm having a grand time enjoying the interplay of the colors without anything specific in mind. Wondering "what would look good here" and then just diving in is a new experience and one I'm enjoying quite a lot. Who knows where it goes, but I love taking a break from thinking so much and just playing in the moment.

What do you think, isn't this cool?

Monday, March 7, 2011

The Scramble Begins...


Hello, All!

I am getting ready for my trip down to CA at the end of next week, and I'm starting to hyperventilate with thoughts of how much I have left to do! One quilt needs binding, several need hanging sleeves, I need fabric for my class with Gloria Loughman, etc., etc., etc.!!! Breathe, Kath...

I have been cutting fabric for my "Laundry Blues" blocks (ugh, several people have their tops done already!!!) -- the sewing is easy and will be a nice break from intense creative activity. Of course I have enough cut for at least a week's worth of sewing, but I wouldn't want to sit around and be bored, would I? :-)

Anyway, I'm trying to use up smaller chunks of older fabric to make room for new stuff (some of it lives on the floor right now...). Anything that I don't use in my quilt will be cut into 5" and 3.5" squares for scrap quilts. This fabric has been in my stash a while -- it was our challenge fabric in 2003. I love my quilt and thought I'd show it to you. It has a wee bit of hand embroidery....!
Back to work, take care!

Wednesday, March 2, 2011

Vintage Bling


Vintage rhinestone jewelry is in, and the bigger the better -- according to the saleslady at the antique shop I visited today. I love to work with crystals and other bling-y bits, but I don't usually wear over the top jewelry. Compared to a lot of the jewels in the display cases, these are fairly subdued but I decided, what the heck, why not splurge on some fun stuff for my upcoming talks -- pretty fun, eh?

Sunday, February 27, 2011

Alchemy

Hi, All! We had a couple of reasonably warm days earlier in the week (considering it is winter in Central Oregon, so above freezing during the day!) and I played at my workbench making the kraft paper background above. It was the wrapping on a wonderful piece of hand-made paper!

I crumpled it, smoothed it out and crumpled it again, and then painted it with a wash of black coffee. I only needed a slurp so Chris was happy to oblige and drink the rest. The color wasn't strong enough so while it was still wet I sprinkled instant coffee powder -- that made the lighter brown splotches.

It was still a bit boring, so once it was dry, I stenciled burnt umber acrylic paint through sequin waste and randomly stamped with a sea sponge. Scanned it in and started to play in Photoshop.

Remember the watercolor and acrylic background I showed you in "Pixels and Paint"? I layered that with the kraft paper background, played with blending modes and got this:

Since the result was so magical, I call it "Alchemy." If you look closely, you will see bits of writing layered in -- I used a bit of text from an old alchemy manual (Wikimedia Commons) and a scrap of a letter written in a foreign language I got as a freebie somewhere along the way. How cool is that? I have printed the image several times on photofabric and want to turn it into a small art quilt. Stay tuned!

Monday, February 21, 2011

Too Late -- I Couldn't Resist! (Photoshop Strikes Again)

What do you get when you mix paint, gel medium, lace, texture gels and stir with magic wand???

I call this Dark Mysteries -- isn't it scrumptious???

I'm shutting down my computer now, I promise!

Stop Me Before I Photoshop Again! (More Fun with Textures)


Playing with textures in Photoshop is so much fun, I never want to quit! :-)

I desaturated the watercolor and acrylic background from my last posting (turned it to greyscale) and layered it with a scan of linen-look blinds. I thought it had a lot of potential, but when I tried it on a couple of images, it didn't do a thing! (As an aside, isn't it interesting how our eyes/brains read watercolor as very sheer, but the scan shows a lot of pigment).

Since the images I tried were quite colorful, I tried again with an image with a very light background. The changes are very subtle and I don't know if they will print on fabric very well, but it could make a pretty postcard:

Wishing you a creative, inspiration filled day!

Sunday, February 20, 2011

Ghost Fish in a Fantasy Pool

Just finished this little quilt -- the black fish border didn't exactly work, but done is good! I quilted ghost fish in the green borders and I hope they have fun swimming in the fantasy garden I've created for them. On to my lighthouse quilt...

Saturday, February 19, 2011

Paint and Pixels, Part Two

Yesterday I painted some bubble wrap and "stamped" on my watercolor background. I could have used a wee bit more paint but I like that the actual texture on the bubbles printed (and no messy paint "blurps"). So far so good: applying the acrylic very gently didn't disturb the watercolor at all and it added some interesting texture.

The whole point of this exercise was to see if I could paint a background with watercolor and acrylic, then run it through the inkjet printer, and this is where I'm less pleased with the results. After the acrylic dried, I used a foam brush to apply a layer of inkAID semi-gloss precoat (as directed in Digital Art Studio by Schminke, Krause and Lhotka). The inkAID is fairly viscous, and the watercolor smeared when I tried to even out the layer. When I didn't try to even out precoat layer, it dried very glossy in spots. The paper was quite bowed when it dried, so I let it sit overnight underneath a large weighted marble tile.

My test print was created in Photoshop using a few digital brushes. The butterfly, dragonfly and plant images were stamped at 100% opacity, while the two water spots were done at 65% opacity and flow. I wasn't sure how my little Canon printer would handle 140-lb watercolor paper (especially with a little residual curl), but it printed quite nicely. The print head caught the edges a wee bit, but trimming 1/8" from each side would take care of that.

It was an interesting experiment -- I loved painting the watercolor background and am so glad I scanned it before messing around more. I'm looking forward to making and scanning more of those and incorporating them into digital textures. Once the background is done and it is time to add digital stamps and/or images, I'd either do it all in Photoshop and print on photofabric (EQ Printables), or print the background and then use a digital ground on a sheer fabric to create an overlay. I haven't tried inkAID on fabric yet, but I'm leaning toward Golden Digital Ground because I think it would preserve the hand of the fabric much better (it isn't as gooey).

I hope that was interesting and useful. Wishing you a wonderful weekend of art!

Thursday, February 17, 2011

Playing with Paint and Pixels

Hello, there! I've wanted to make some of my own backgrounds for a while, so I dug out my watercolor paints this afternoon and started playing. I decided to work with analogous color in the warm half of the palette. I'm still a watercolor rookie -- things dried out much faster than I expected and I didn't get much mixing. Since I ADORE splatter painting, I just had to add some while I still had paint on my brush! I scanned it at 300 dpi in case my next layer looks yucky...


Before I add more paint (my workbench is covered with silkscreens that just got their last coat of varnish!), I thought it would be fun to tweak the image a bit in Photoshop. I dragged my painting into a new postcard file, selected one of the red-orange colors and used a digital brush to grunge it up a bit. I set the brush at 50% opacity and it evened out the colors and toned down the brightness quite nicely. I can't wait to print this on fabric and use it as a postcard base!

Bedtime -- I'll post again soon!

Monday, February 14, 2011

In the Kitchen with a Paintbrush

Hello! I hope you're all having a wonderful day. It is gray and dreary here but I have lots of fun projects to do inside so I'm not going to let a little thing like the weather get me down (plus I've had too much caffeine...!)

A couple of days ago I wanted to get some fabric ready for a project I have in mind, so I decided to whip up a flour resist. I mixed one cup general purpose wheat flour (not whole wheat) with one cup of cold water together until it was the consistency of pancake batter ("recipe" from Jane Dunnewold's latest book Art Cloth). I used a whisk to get most of the lumps out. That's as close as I try to get to real cooking!

I had a piece of boring mauve pink hand-dye (batik) pinned to my "print board" (June Tailor "Quilters Cut & Press" with a rotary mat on one side and padded surface on the front). I had an extra piece of muslin wrapped around the padded surface to catch drips but I don't really care if a little paint leaks through.

The batik is approximately 11" x 18" -- larger would be nice, but that fits on the board. Per Jane's directions, I pinned the top of the fabric to the board but left the other three sides loose. I poured about half the flour batter on the fabric and used an old credit card to smooth the resist into a fairly thin layer -- just thick enough so the underlying color was barely visible, but not as thick as frosting between layers of a cake. :-) Half a batch would have been perfect for a piece of fabric that size.

The fabric stretches quite a bit when the resist is applied, but then shrinks considerably as it dries. I used those large "quilters pins" and some of them bent by the time everything was dry!
I let the fabric dry overnight and then got ready to paint.

The fabric was quite stiff and the resist felt like a sheet of egg shells -- cool but a little difficult to work with. I held the fabric over a trash can to catch any bits of resist, but very little actually came off. I scrunched it quite a bit to get it to crackle -- Jane warns against being too aggressive and I can see why. Fine hairline cracks will yield the most interesting texture but I crunched until I could see the fabric in a few places.

I used three colors of Dye-Na-Flow fabric paint: magenta, cranberry red and claret. I picked that paint because it is very thin (watery) but highly saturated so it should work its way into all the nooks and crannies. I worked it in to the resist and made sure the surface got thoroughly wet. Here's what it looks like from the front:

The paint takes about 2 weeks to air cure (possibly less since there isn't as much binder in this particular paint). The flour will wash out, but since I can't really heat-set the fabric with the flour on it, we'll just have to wait. Here is what the back looks like -- you can tell where I went overboard scrunching. I really worked the paint in, but it spread under the resist in the open areas more than I expected:

It is a fun process and I'm looking forward to doing it again soon. It definitely isn't instant gratification, though!

Sunday, February 13, 2011

UFO No More... (I Hope!)


I dug this piece out of my UFO pile -- I started it in a class several years ago. The original project was an embellished purse, but I just don't enjoy that kind of sewing any more so I think I'll turn it into a little quilt.


The deconstructed deep green braid is a nicer color than it appears in the photo, but there just isn't much contrast between the braid and the black background. I've auditioned a few fabrics for the borders and think this combo brightens it up a bit and (hopefully) gets away from any impression of Christmas colors. The proportions aren't quite right but I think it has promise. Any comments?

Saturday, February 12, 2011

A Burst of Creative Energy!


Hello! Hello! Hello!

I was in a bit of a funk after I gave my latest quilt top to Tammy for quilting -- just couldn't decide what to start next. I want to have at least one more new project for my my show at Asilomar next month, but nothing called my name. I have several pieced tops in progress, but they're not knock- your-socks-off projects. What to do? I spent much too much time playing solitaire and fiddling with images in Photoshop...

Yesterday I got a call from a quilt guild in the Corvallis area. They need a speaker for their April meeting and would like to see my surface design and embellished quilts. That was the kick in the rear that I needed! This morning I whipped up a batch of flour-paste resist and applied it to a piece of mauve batik and now it is drying in the garage. I also messed around with a thermofax screen. That technique will need some practice, but it felt so good to play with paint at my workbench again. I've got some new stencils to play with, too, and now it doesn't feel like there are enough hours in the day!

Saturday, February 5, 2011

Found in an Old Drawer...


I spent some time online yesterday looking for the perfect landscape photo for my class with Gloria Loughman next month, and came across this one on Wikimedia Commons. If you haven't looked there yet, you may be surprized by all the cool stuff you can find. Almost everything that I've seen is in the public domain or is available under a Creative Commons license of some sort. The images can be shared or remixed (used in your own artwork) -- each image includes usage info so you know what you can do before you download it.

I thought it would be fun to tweak the image and make it look like we just found it in the back of an old drawer somewhere. I changed the colors to sepia tones and added two texture overlays and here is the result:

I think this one needs to become a little quilt, don't you? I can't decide if I should stay with an old-fashioned look (some piecing and maybe a bit of embroidery or applique) or as part of an artsier collage. Any thoughts???

Layer 0: Image by Daniel Skorodjelow
Hue/Saturation layer to change to sepia (lightness boosted slightly from default)
Layer 1: Croquis Dessin by Boccacino, multiply mode, 100% opacity
Layer 2: aged2 by Skeletal Mess, overlay mode, 65% opacity

Tuesday, February 1, 2011

A Quick Visit

Hello!

I've been toiling away on class samples to be turned in today -- lots of binding so my fingers are sore. This sample is for my digital artwork class. I love the magic that can happen with Photoshop blending modes!

I know you can't tell, but Miss Smartypants here decided to add some "big stitch" quilting with #12 pearl cotton in the photo area. She rummaged through all her fibers for the perfect muddy blue, brown and purple and matched the colors a bit too well! (Miss Smartypants isn't particularly smart after all -- she cut away the stabilizer, but didn't think about trying to stitch through two layers of batik, fusible and EQ Printables plus the backing and batting...). No wonder she switched to monofilament and the sewing machine!!!

If you enjoy playing with textures in Photoshop or PSE, check out Kim Klassen's website (thanks, Marlis, for the pointer!). She's offering an e-course called "The Art of Texture" starting next week -- can you tell I'm counting my pennies and drooling already???

Tuesday, January 25, 2011

Salvaging Cruddy Photos

Just a quick tip -- if you're taking pictures of quilts (or other items that should be square/even from top to bottom) without a tripod, there are times when you won't be in quite the right place and the image will be a bit wonky. You can fix keystone-shaped images pretty easily in PSE by using Image > Transform > Perspective. Adjust the corners until the image looks right.

Wednesday, January 19, 2011

Happy Golytely... :-(

Well, my artistic peeps, by now those of you "in the know" can guess what is in store for me this afternoon... As my hubby says, I am about to drink "jet fuel" in preparation for a belated birthday present from my gastroenterologist -- a colonoscopy. Yes, the beloved right of passage for 50-year-olds... If you haven't had the "pleasure" yet, be patient, you'll get your turn!

Ages and ages ago, I made an Ocean Waves quilt in shades of green and teal. The goal was to use up my stack of green fabrics! That definitely didn't happen and actually played a role in developing my stash acquisition strategy. :-) A couple of years ago, I decided to revisit that pattern and started making these blocks in blue and green batiks. I was going to use the blocks in the border of an art quilt but they didn't work out and they went into the cupboard. The colors are perfect for the digital collage I posted on the 15th so we'll see if they work this time.

In case you're wondering, this palette is similar to the one we're using for the "Laundry Blues" challenge (and quite a few of the fabrics will appear in that quilt as well), but isn't quite the same. This one goes to a more yellow-green and avoids the purples. It will be interesting seeing the two quilts side by side.

Wish me luck as I head downstairs for my first dose of yuckiness...

Saturday, January 15, 2011

So Many Blogs, So Little Time!

There are so many interesting ideas, techniques and wonderful eye candy out there, how is a girl (or guy) to choose which blogs to visit? or which projects to work on? How to juggle it all???

I attended a webinar on marketing oneself yesterday, and one idea for generating interest was to visit and link to other blogs. I know I could easily get sucked into hours on the computer and then not make any progress on my projects... How to choose? If you've got a good answer, please let me know!

Here's what I'm going to try: visit a blog, find a tidbit of inspiration, and then get to work. Don't know if I can do it without getting sucked in, but here's today's pick -- GrannyGoodStuff. Thea's got a quote from Erma Bombeck that I love:

"When I stand before God at the end of my life, I would hope that I would not have a single bit of talent left, and could say, "I used everything you gave me.""

I'm not sure it is possible to use up talent, but what a challenge and privilege to try. In Erma's honor, I whipped up this little digital collage. As usual, Photoshop Elements blending modes transformed some wonderful images into something glorious. I can't wait to print it on fabric...
(technical details follow if you're interested).
  • Background: "A Wash of Blue" artist paper from Somerset Studio magazine (scanned at 300 dpi) -- I love anything with handwriting, as long as it isn't mine!
  • Layer 1: SpotDots brush by Katie Pertiet (selected a deep blue from the design, Soft Light mode, 50% opacity)
  • Layer 2: a stunning photo of the flowers on a black background from "The Agile Rabbit Picture Atlas of Flowers" (Overlay mode, 80% opacity)


Friday, January 14, 2011

Latest and Greatest Scrap Quilt

Darn! Wish I could hold the camera straight! Guess that's what a tripod is for, but I took this late Wednesday night and dragging the tripod out wasn't an option.

Enough whining -- I love this scrappy design! I used a print and a batik in block -- the print is used consistently in the "12" and "6" o'clock positions and the batik in the "3" and "9" spots. That could border on obsessive (if you say "anal" I will come slap you!), but I like to have some consistency in quilts this scrappy.

For a while now I have been cutting leftover fabrics into 5" and 3 1/2" squares, and this design
uses them both. For each block, you will need two each of the 5" and 3.5" squares of your print and batik fabrics. The larger squares make up the main star, and the smaller ones make up the corner units that form the secondary pattern. I cut strips of the background fabric: 5", 3" and 2.5".

I really like making half-square triangles a little over-sized and trimming them to fit -- I think they're more accurate for most people. I place two pieces of fabric right-sides together, mark a diagonal line from corner to corner, sew 1/4" on either side, cut on the drawn line and press toward the dark.
  • Layer a 5" print or batik square with a background square and make two half-square triangles as described above. Trim to 4 1/2" squares -- these are the large points.
  • Trim each remaining 5" square (print/batik) into one 2.5" x 5" rectangle and two 2.5" squares. Sew the rectangles together into a 4 1/2" four-patch (block center). The two squares are used in the corner units.
  • Layer two 3" (or 3.5" squares if you don't want to trim them) print/batik squares with background squares and sew as above. Trim to 2 1/2" squares for the corner units.
  • For each block you will also need four 2 1/2" squares of the background material for the "plain" squares in the corner units.
  • Each corner unit is a four-patch composed of one background square, one print/batik square and two half-square triangles. Pair a print square with two batik half-square triangles with the background square diagonally opposite the HST. Make two units of each combo. Refer to the photo for placement.
  • Have fun!

Monday, January 10, 2011

Two of My Favorite Things

Fabric and my little dogs rate right up there as some of my favorite things. (Wookie says "Mama, can't you see I'm trying to sleep?")

My silly little dogs are a great reminder that it takes time to master a new skill. In my case, that would be dog training and agility. Yesterday in a workshop, Yoda completely blew me off and I had a terrible time getting his attention again. Of course, that happened while the whole group was watching, and no one else had that problem, not even the people with much younger dogs.

I rarely make a quilt that is a disaster anymore, but it is easy to forget that way back when, more than one piece ended up in the garbage... It took a lot of work to get where I am as a quilter, but I want to be that good in agility NOW without it taking years to get there! The hard part is that even if I manage to do everything right (which isn't likely, but still...), I have to count on my little partners as well. 'Tis a humbling experience, to say the least!

Friday, January 7, 2011

Interesting New Ruler

My "Laundry Blues" quilt has oodles of half-square triangles, which I like to make slightly larger and cut to size (like most people, I cut more accurately than I press and sew...). The corners of my favorite "square up" ruler are getting worn so yesterday I went looking for a replacement. I'm normally not a tool junkie (fabric and beads are a different matter!), but I saw this and thought I would give it a try.

The gray strip running down the center is actually a channel cut in the backside of the ruler. It butts against the seam allowance and is supposed to be more accurate than traditional rulers because it doesn't wobble because of the bulk of the seam. I like the idea and use it for the first cut, but the measurement lines aren't quite where I would expect them to be for the second cut. If the lines are a thread past the outer edge of the block, then the final square measures true according to my other rulers. :-)

If you've used this ruler (an Australian import), let me know what you think.

Thursday, January 6, 2011

"Laundry Blues" Swap

For the holidays, my Sit and Sew group swapped 10" squares of fabric ranging from green to violet. We each end up with 40 different fabrics and the goal is to make a quilt using them in time for our guild show in August. Since some people don't like to mix grayed tones with clearer hues, we stuck to a clear palette. We tried to keep the rules to a minimum: we can use any/all of the 40 (if you hate it, you don't have to use it!) and can add additional colors or fabrics. The quilt has to be at least 36" x 36" so we can enter it in our show, but larger is fine, too. Any style is fine as well.

I love making scrappy quilts, so mine will use LOTS of different fabrics. I picked a traditional design in a repeat block format and have made a couple of blocks already.

As soon as we swapped our fabrics, it became obvious that, as usual, medium-value fabrics comprise the bulk of the fabrics in the stores and in our stashes. It will be interesting to see what everyone adds to the mix to get enough contrast in their designs. My challenges will be to use up some of my older fabrics (I need to make room for the new stuff!) and to avoid getting too "matchy-matchy".

Saturday, January 1, 2011

Getting Ready for Spring

The temperature is still below freezing and we got a dusting of snow last night, but this little bracelet has me in the mood for spring. I haven't made many links like this before (simple loops on each side of the round green beads) and need a bit more practice but I'm feeling more confident making wrapped loops. Isn't it silly -- I stress over each wrap because I'm focused in so tightly, but once it is on my wrist, no one will notice! One good thing about lots of dangles is that a single lumpy wrap is pretty hard to spot. So just jump in and start wrapping... :-)