 I'm sure this is a sign of my Virgo-ness, but I have spent tons of time tagging all my images in Photoshop Elements. If I'm looking for a bird or a brush (or a bird brush!), one click brings up just the subset I'm interested in. I lost all the tags when I upgraded to Windows 7 and couldn't get my backup to restore correctly, so I've been obsessed about getting a copy on my laptop just in case. I got it to work today -- hooray, sigh of relief! It is a bit time-consuming, but definitely preferable to recreating all the tags.
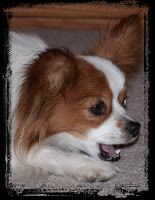
I am still slogging away at binding on my scrappy sofa quilt for my class in two weeks, but binding is boring so here is a picture of my darling Yoda working on a chewie.
I used a photo mask meant to look like a Polaroid transfer for this one. I hadn't done a lot with photo masks until yesterday but they are pretty cool. I have two kinds to choose from -- brushes and png files. They are both magical in the way they transform a photo, but the png files may be a little more useful because they blend a photo in to an existing background better.
- Brush -- Add a solid black fill layer on top of the photo, then stamp with the photo mask brush in white "ink" to expose the photo below.
- png -- Drag the mask onto the working file, then drag the photo on top of the mask, making sure to cover the completely. With the photo layer active, CTRL-G to "glue" the layers together. The photo will appear in the mask and any "hangovers" will be cropped off.
No comments:
Post a Comment