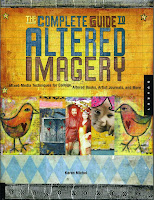
 Anyone who has seen my library knows that I do my best to keep the publishers of quilting, embroidery and beading books in business. Every once in a while I buy something that Amazon recommends, even if it isn't directly related to those topics, and this is one of those books. I skimmed through this one when it came but didn't really read it until recently.
One of the first manipulations in the book uses sandpaper or an awl to scratch up a lab-processed photograph; another takes it a step further by placing a texture/rubbing plate under the photo and scratching away. Scratching "real" photos reveals a yellow layer under the emulsion. I love the idea and wondered if I could do the same thing in Photoshop Elements.
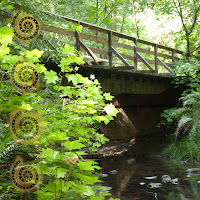
I created a new file with a mustard yellow background. Added a layer and stamped some swirls (aligned so I knew where they would be). Dragged a photo onto a new layer and started erasing the photo away over the swirls. "Digital Art Revolution" by Scott Ligon suggested using a drawing tablet and hard brush to simulate a paintbrush, so I dug out my stylus and gave it a try. I'm not a doodler and didn't like the hard scribbles, so I backed out the changes and tried again with a larger (100px) soft-edged "brush" in eraser mode set at 46% opacity. A single click or stroke isn't as dramatic this way, and I like soft edges in the example below.
 The swirls have nothing to do with the bridge except they were quick and easy to stamp, but I can see a lot of potential for this technique with logically related images. I know I could do the same thing by masking off part of the image instead, but this appeals to me since I was replicating a physical manipulation. Cheers!
I like this idea,it has potential. When I've mastered layering I'll give it a try.
ReplyDeleteHave you found the tutorials at www.cottagearts.net and www.designerdigitals.com? I've found a lot of useful info there. After that, just play! I've found that to be the best way to understand how it all works. K
ReplyDelete